ButterMyBiscuits Etsy Shop

Sunday, September 29, 2013

Halloween Wreath on the Cheap

How to create a Halloween Wreath for less than $5.oo! 
[ This same concept could be applied to any holiday. ]

Materials: 
$1 wreath ~ Dollar Tree
Strips of fabric (fleece and desired print) 
String and black paper (or sewing machine) 
Ribbon of your choice
hot glue gun/glue sticks

I wanted a chevron print like the sample on pinterest, but in the interest of saving money I used some black and white polka dot fabric I had lying around. 

I cut the fabric into 2 inch strips...roughly. Cut first and never measure is my motto. 

Here's my dollar store wreath. I need to beef it up a bit, so I started by wrapping it in fleece strips.

Simply hot glue and press fleece onto glue...then wrap.


Once completely wrapped, I started the 2nd layer of fabric which is the print. I used the same method of hot glue and wrapping...covering up any unwanted seams/ends.

I tied a large green ribbon around the wreath and made a big bow. I always test my wreath on the door before I make any knots so that I don't cover up our peephole. 


The final touch was some paper bats I cut from scrapbook paper. I sewed this little garland using the sewing machine...I will probably redo these with some black paper and better spacing. But in the interest of wanted to say I finished the wreath, this will have to do tonight. 

Tada! Halloween Wreath for less than $5. 

18 Fun Halloween Decorating Ideas
Here's my inspiration from Pinterest. 

B&W Sketchbook

So, I took some black and white photos of some sketchbook drawings. And then I played around with some filters with Picasa...which is a free program. I wish I could afford photoshop and then I wish I could afford a photoshop class. For now, I get to play around for free.

This is my new favorite thing to do. These drawings were done with markers and the different values they get reduced to in B&W is pretty interesting.


Wishful Thrifting...

I will regret not buying this painting for life.

Where were these last halloween? 

The Adventures of Tiny T-Rex and the Doll Parts


Every time I disassemble/behead a doll, I feel a piece of my soul die. But, hey...I still do it. 
This halloween our them is 'cartoon characters for costumes' so I'm trying to apply some of that to the decor. I saw this great idea on {pinterest} with doll heads in glass jars. I felt like I had to recreate that for our Halloween tablescape this year. I have a Halloween decoration addiction you should probably know about. 


I went thrifting yesterday on the hunt for bottles for my DIY Potion Bottles
and for dolls and a glass jar to hold their heads. Sounds so creepy when it comes out like that....


Along the way, I found this little friend and couldn't leave the store without him. Tiny T-Rex!

I'll add some green food colored water to this for the party....just to give it that 'formaldehyde' look. 

Tiny T-Rex had such a good time hanging out with the bone yard of doll parts. 

So my next idea for the doll parts was to either have them sticking out of dips (I'd wash them of course...) or create a garland of hanging arms and legs in a doorway somewhere...maybe a wreath even? 
We'll see what happens. 


Halloween Potion Bottles DIY

Admittedly, I found this idea on "pinterest"...so naturally I stole the idea and am now blogging about it.

How to make "Potion Bottles" from thrift store bottles and $.96 flat black spray paint.
Cheap cheap cheap project and it looks really cool.


Here we go....I bought 4 bottles...they were 99 cents a pop...which is kinda pricey, but they are neat so I splurged. I also braved the vastness of Walmart to get some cheap spray paint...so this project cost $5.


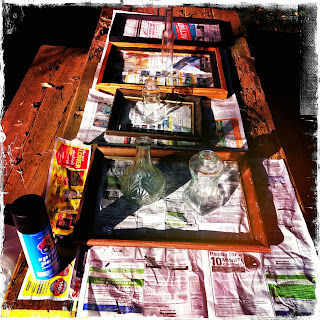
 I also found some wooden picture frames that I thought I'd jazz up with some black too. I swear spray painting thrift store items is probably one of the best things in the world. Spray paint will fix anything.

This poor old picnic table has become my spray paint station. If you don't have a junky picnic table in your backyard, I recommend buying a "spray paint" tarp or just use newspaper. 

Loving these bottles so much. 


Here they are...all corked up and potion-y.


I used corks that I have stock piled at home. If you don't have any corks, start drinking wine I guess? For the larger bottle mouths, I used champagne corks.


Saturday, September 14, 2013

Andy Goldsworthy Inspired Berry Photo Shoot

So a tree fell down in our yard after some bad storms here in Nashville. Of course, my handy husband insisted that we remove said tree ourselves. It was 6 grueling hours of chainsawing, using our 87 Chevy Rape Van to uproot the rest of the tree and obviously, finding amazingly bright colored berries and taking about a thousand photos of them. 


The color gradients were so perfect.


Vanna White